This winter has been pretty wearing on everyone. Your bike included, that is if you’re like me and still riding through this mix of rain and slush and snow and ice and salt and sand.
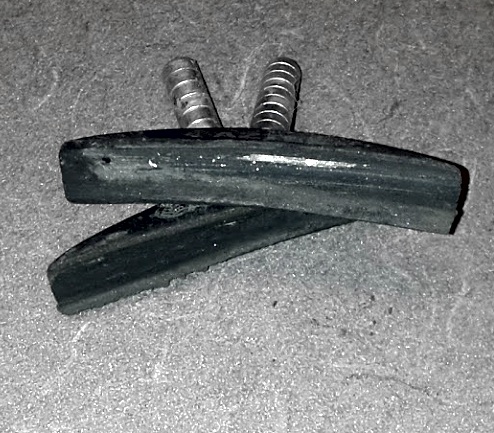
Keeping the bike clean is definitely going to keep everything working well, but if you use your brakes much (hilly commute, lots of stop lights) they are going to wear much more this time of year and it is very important to keep checking them. Part of the cleaning the bike is removing enough grime to better check wear. And nothing hides behind the grime better than brake pads.
There are many different styles of pads; some depend on type of bike and brake. But you can reduce it to two main styles of pads that you’ll find on any bike. You have ones with inserts, or the whole unit as one (internal backbone ones). The insert type is usually a bit easier to replace and requires less fiddling than the whole pads do. The down side to the inserts is that you wind up with more rim damage if you let them wear down to nothing. V-style pads and holders tend to be very thin and wear a bit sooner than some of the road or internal backbone pads, and if you have them be especially attentive.
Now sure, wait until they wear a bit or start making noise, but then rather than wearing out something that costs $5 to $20, you wear out something that’s going to be at least 10x that, even more if you can’t find the exact rim or can’t rebuild the wheel yourself.
Yes, rim wear is a real thing. And I don’t like it. I think I’m through maybe a half dozen rims from wear (not that many, I guess), but I made a change after the fourth rim that has greatly changed the wear rate on the rim – I’ve switched to a very specific pad. A pad that is much gentler on the rim but still has excellent braking characteristics. Kool-Stop Salmon. There are no other pads you should be considering unless you have carbon rims. Not sure there is anyone who commutes on carbon, and anyone who does probably has a handle on the brake pad situation, but if you have rim brakes and aluminum rims those salmon pads will keep the rims intact for much longer.
Chain wear and brake pad wear, two very important things to monitor that if ignored wind up being very costly. Check the chain with a tool (or measure, but the tool is better as it actually checks the roller wear, not just wear on the pins and plates) and visually inspect your brake pads. As a rule, get the brake pads changed when you still have between 1-2mm of pad before the wear line or insert holder. You could change them sooner if you like but if you get a pair at 2mm wear maybe they’ll wind up at 1mm when it is time to change them.
If you’re one of the smart/lucky ones and have disc brakes? Well you gotta get those changed before the metal backing touches the rotors. The beauty of the disc brakes is you never wear out your rim and you’ll just not be able to stop if it winds up metal on metal, not really costly for the equipment as much as very scary. Visual inspection to make sure there’s pad left on the discs is a good idea. Washing and cleaning is the perfect time to check those.
The only downside really to the salmon pads is they can be a bit dirtier than some of the black compounds, but man i’d rather spend time washing the wheels than replacing the rims. But that’s me personally and I can replace the rims myself (as I have plenty of times).
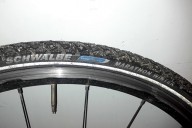
I was reminded of this when I got a puncture flat on the studded winter tires on a busy two-lane road without a shoulder on a 33*F slushy rainy morning. These tires I have are 700x35c tires and if the the cold and wet wasn’t enough, the carbide-tipped studs made sure it was an extra painful experience and yes it was a bit dirty even after having recently washed the bike (riding in wet slush will do that). It was a perplexing flat tire. Not a snake bite (impact causing a pair of holes as the tire is compressed against the rim hard enough to poke a pair of holes in the tube), and not a leaky valve. It was a straight up puncture. Something worked through the gap in the tread blocks and it was flat. I did have a spare tube, but it was for 23-25c tires. Did it work? Yes, it worked just fine. Butyl tubes are pretty elastic and usually can work for a huge range of sizes. But plus sizing. Plus sizing of the tubes is a trick that will buy you time to clean something out of your tire, that will both keep air in the tire longer and be more resistant to snake bite punctures.
What is plus sizing? Simply put it is using an inner tube that is one (or more) size larger than typically you’d think to use. Now. Yes. You can get too big. A tube so large that you can’t make it fit. That’s obviously kind of a problem. If you can’t get it in there, well that’s not going to work. But usually you can get at least one size up in the tire. At the very least make sure your tire size is the very smallest listed on the box. Say you have a 700x28c commuter tire (smallest tire width I’d consider for commuting), don’t use a tube designed for a 700×23-28 or worse an 700×18-25; find a 700×28-35 if you can, or a 700×30-38 and stuff one of them in there. Yes a 700×18 will work, if you have a flat getting home pedaling is way better than walking or waiting for a ride. it will work but it won’t survive as long as a proper size or a plus size, best to take the skinny tube out when you have time and a warm dry place to do it.
Yes, you DO get a big benefit from plus sizing, especially as a bike commuter. It does come at a slight weight penalty but we’re talking a handful of grams. Not significant compared to the added puncture resistance. Puncture resistance comes from not stretching the tube out quite as much, you wind up with a thicker walled tube that has much more elastic potential, and when it comes to snake bites that’s a good thing. Even with some punctures, maybe you hear the repetitive clicking of the glass in the tire, if you have a plus size tube you stand a good chance of getting that glass out of the tire casing before it can actually wear through the tube. Now benefits for a commuter don’t stop there. No, the thicker wall of the plus size tube is less porous, means holding your tire pressure longer, means less frequent need to top up the tires, and less risk of snake bites because the tire pressure decrease caught you by surprise.
It may take a bit more work to get the plus size in there. Using a bit of friction-reducing compound definitely helps install them. Baby powder (cornstarch) or talcum powder (not corn starch) help significantly and is almost required for installing a plus-size tube to make sure it seats itself well as you inflate it. The powder can also make it easier to install a difficult tire on the rare challenging rim.
Plus sizing is a bit of a loose guideline but it is one I’ve been using with great success for over 20 years. Certainly for a race tire going with a super light weight tube can help in a race, but we’re not talking racing. Now for long-haul riders, having a slightly thicker tube makes it a bit more elastic and that gives you more vertical compliance, and that means more comfort – and most importantly – less fatigue, and chances are if you’re going for a long ride, without a team car following you, the savings of 20-50 grams per tire is eaten up by food, water, and other stuff you are likely carrying, and when you add up you and the bike, even considering it is rotating mass, it is well worth the tradeoff.
So check your pads, when they wear out slap in some Kool-Stop Salmon pads. One set of pads won’t kill a rim, and next time you change your inner tube slap in a plus size. If you want to be proactive go ahead and replace everything and keep the old stuff as emergency working backups.
Take care of the bike you rely on to get to work, and don’t let a preventable mechanical force you to use a less desirable alternative form of transportation.
-G








2 Comments
Been using them for a couple of years now.
Ah, you remind me that I gotta check my pads.